Bethsoft Tutorial Static Collections
Contents
Static Collection 101
Or: All you need to know or would want to know about SCOLS
This article may rely on features not available in public releases of Fallout 3/New Vegas or the GECK.  It is included here for
education and posterity.
Introduction
Because many of the buildings in Fallout 3 were kit based, and keeping object count low was essential for performance, a system was designed for the editor to combine kit pieces of a building (or other items/kits, as the need arose). This was a much faster way to create a building from kit pieces than recreating the structure in 3ds Max. Essentially a SCOL, or Static Collection, was a way to group several .NIFs together into one object. This process creates a new .NIF, which can be viewed as any other static object in the editor. A Static Collection can be broken apart after creation, and its instance in the world deleted, but the new SCOL will remain in the object list until it is deleted out.
First I will go through the steps to create a Static Collection, and then I will get into when SCOLS can be useful.
Creating Static Collections
Static collecting an object
Pictured in Fig 1a, we have several sidewalk pieces that we’d like to combine in a group. Perhaps this configuration of sidewalk pieces is used again in the scene and instead of rebuilding the section; we can just reuse the collected group.
First, make sure all the pieces are snapped together properly and then decide which piece you’d like the pivot to remain with. The pivot of the first piece you select in the group is where the pivot of the static collection will end up. For our example, we want to begin with the corner piece highlighted in Fig 1b, below. Then ctrl+click to select the rest of the pieces in any order. The pivot of the static collection will match the pivot of the corner piece.
An important note if you intend to use this SCOL on the grid, which would be the case with our sidewalk example - make sure
what you are collecting is not rotated already to a random angle. Acceptable rotations are 0, 90, 180, -90, -180 or 360.
Some kit pieces may become rotated in arbitrary directions. The cause for this is usually a transform on the root node of the
kit piece NIF which hasn't been applied. Applying the transform with NifSkope and then adjusting the rotation of the kit piece in
GECK will fix this issue. LOD NIFs will also need this adjustment.
With these selected hit ctrl+g and this dialogue with come up:
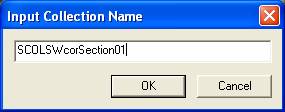
Notice that it lets you know where the pivot is going (first piece you choose). If all sounds good, click yes and the Input Collection Name dialog will appear. Good practice is to prefix all the Static Collections I create with SCOL, so you can distinguish what is a Static Collection in the Render Window when I select it. Otherwise, they appear as any other static while you are world building. So in the sidewalk example above, I’m going to name it SCOLSWcorSection01 and hit OK:
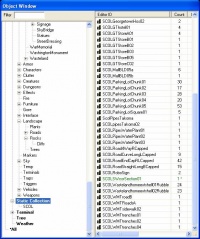
Now we have our new sidewalk Static Collection, which will appear in the editor as a new reference under the Object Window hierarchy tree in World Objects>Static Collection
This object can be placed and snapped to like any other kit piece, and can save time during world building if that particular sidewalk shape is used often.
Breaking apart a Static Collection
Now let’s take the collection and break it apart. Say we decide we’d like to have the sidewalk turn the other way by adding a new piece, as in the first image in the set below.
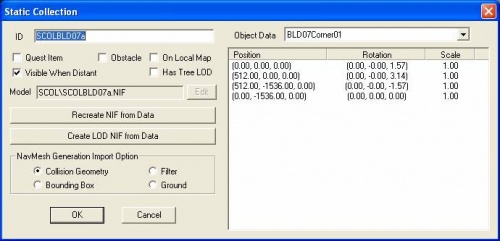
There's no need to delete the SCOL and rebuild the section to fit the new piece. Rather, we can break apart the SCOL, separating it into its original references. Double click on the sidewalk SCOL and click the Edit Base button. You will see the Static Collection Base Object dialog, pictured below.
Notice that if you scroll through the Object Data list all the original objects that comprise the SCOL are being listed here. This shows that though the SCOL exists as a new reference, and creates a new object, it is still comprised of the original pieces.
Exiting that dialog, and, with the SCOL selected, press CTRL+G. You will be confronted with this message:
Click yes. Notice that the sidewalk pieces are restored as separate objects, as pictured below in Fig 2c.
Now you're able to rearrange the sidewalk as pictured in Fig 2d.
You will notice in the Object window that this has deleted the reference of the SCOL in the world, but not the new .NIF. That SCOL can still be used again, if it seems important. If not, you can delete it out of the object list, too.
If a piece you wanted to go into a SCOL happens not to make it (wasn’t selected), there is no way to add it after the
collection is made.  You must break apart the SCOL it was intended for and re-group under a different name.  Don’t forget to delete
unwanted SCOL's from the object list; it will be deleted from the scene, but not from the GECK.
Static Collecting Objects with LOD
LOD is an abbreviation of "level of detail", which itself is game development shorthand for rendering distant objects at a
lower level of visual detail to improve performance.  LOD, as it pertains to Fallout 3, encompasses landscape and larger buildings
that we don't want to pop in harshly.
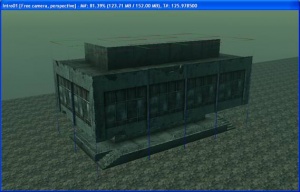
Let's assemble a building, as pictured in Fig 3a, from kit pieces that we'll like to make into a SCOL. This example uses several pieces of the BLD07 kit, found in the object window under World Objects> Static> Architecture> Urban> BuildingKits.
Much like the sidewalk example, make sure all parts are snapped properly and first select the piece that this SCOL will inherit its pivot from. Selecting the rest of the pieces and hit CTRL+G. The confirm collect dialog will appear; choose "Yes", and use "SCOLBLD07a" as the new collection name.
The BLD07 pieces in this example have LOD information associated with them, so you'll be prompted by the "Create LOD?" message box. Select Yes to allow this building to appear in the distance. This will create a new .NIF file in your ...\Fallout3\Game\Data\Meshes\SCOL directory.
SCOLs created w/LOD will automatically be checked on the base object as Visible When Distant.
So what happens if you collect objects that have LOD with objects that don’t? Let’s say I’m combining the building and the sidewalks into one SCOL, as pictured in Fig3b.
Using Ctrl+G, create and name the new SCOL. You will be prompted with the a new "Create LOD?" dialog because the sidewalk pieces do not have LOD associated with them. The static collection will still be made, and a LOD .NIF will be created, but only for the original pieces that had LOD associated with them.
Using Static Collections
What can I group into a Static Collection?
As the name implies, only Static Objects can be used in a Static Collection. Let’s see what happens if we accidentally select a character, piece of furniture, and an activator with the sidewalk that we want to collect, as pictured in Fig 4a.
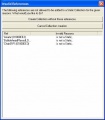
Selecting the objects, and attempting to create a new SCOL with CTRL-G yields the "Invalid References" dialog as pictured in Fig 4b.
This is a failsafe to make sure non-statics don’t make it into the collection. At this point you can decide to continue with the collection and exclude the references that are not statics, or cancel out and try again.
You also cannot collect Static Collections into a new SCOL.  You'll need to break the SCOL(s) apart and build the new, desired
arrangement with the component pieces before grouping into a new SCOL.
What happens if I change the base kit piece of a Static Collection or added LOD for a piece in the collection?
Here’s the scenario: You’ve created a Static Collection of a building kit, but then realized you want to change the roof on the kit pieces and add LOD for all the kit pieces. How will that effect the SCOL made from the kit pieces?
In short; it won’t. You have to update the SCOL to reflect the changes you’ve made to the base pieces. Here’s how you do it: Once you’ve made the modification to the piece, and perhaps built LOD for each piece, find the SCOL in the object list and double click to edit the base object properties.
Here you will see the two buttons "Recreate NIF from Data" and "Create LOD NIF from Data". If you click these two buttons, you will update your SCOL with the new art and update and/or create new LOD for your SCOL.
Practical uses for Static Collections
- Reduce object count/draw calls
- Kit based objects increase object count tremendously in a scene. By Static Collecting kit pieces, loading gets quicker. It also helps consolidate textures. Let’s say this building is made from one texture map, and is comprised of eight kit pieces. To the renderer this is counted as eight objects/draws.
- Faster world building
- If you world build several different building shapes from a kit and collect them into SCOLs, you can reuse those buildings elsewhere without having to rebuild the kit pieces together again. If the SCOLs are used in the same loaded scene, it will reduce the number of references needed to load.
- Keeping objects from fading out for a longer distance/have certain objects fade together
- Though the system wasn’t specifically designed with this in mind it can come in handy. Sometimes you may come across a group of objects that fades in at different times in the game and that can look a little strange. A good example would be a sign made from a letter kit. Separate, these letters would have very small bounds, and fade in right in front of the player. To force them to fade in at a farther distance, you could collect them into a SCOL, thus increasing the bound, and the distance at which they fade in. Or, if they were on a building, static collect them with the building, so that they will appear with the building at a greater distance, and the player would be less likely to notice.
Things to avoid
- This tool is easy to abuse
- It’s probably a really bad idea to select everything in the scene and turn it into a SCOL. Remember, only objects that share textures will actually reduce the object count. If you combine a metal object using its own texture, and a concrete object with another texture, it still counts are two objects. So be smart- kits often are the best candidates for SCOLs.
- Making large SCOLs will increase the bound of the objects…large bounds can = badness, especially with placed lights.
Blender, 3ds Max, and NifSkope Considerations
- Exporting Models with Blender
- The default options with Blender as of version 2.49b and the Blender Nif Scripts as of version 2.4.12, do not set two key variables correctly for exporting NIFs ready for the GECK.
- After selecting "Export->Netimmerse/Gamebroyo (NIF) in Blender, you will notice that the "Stitch-Strips" button is not selected by default (it will not be highlighted). Make sure to click/select the "Stitch-Strips" button, or your NIF file will have too many Strips. This means the object will work fine in-game, but will look extremely bad if you attempt to add the object to a Static Collection - the model will look shattered.
- Condensing collision with 3ds Max
- After a SCOL, collision mostly works fine (GECK scrambles some bhkRigidBody flags), but impact decals completely stop working. This is due to the collision objects being reparented and targeted to NiNodes with no TriStrip/TriShape geometry.
- The best solution to restore impact decals is to load up the SCOL NIF in 3ds Max, merge the collision objects, break up the MOPP sub-shapes, and reexport with one bhkPackedTriStripShape collision shape. After cleaning it up in NifSkope, remove the original collision blocks from the SCOL and add the new collision to the root node of the NIF and target it.
- This is technically doable in Blender, but proper multi-material MOPP in one shape is currently unavailable and would require breaking up the geometry and collision to have multiple materials.
- Setting the "TSpace" flag in NifSkope
- The TSpace flag is set = 240 by Blender when exporting to a NIF file. This value is not correct for Static Collections, and in fact the GECK will crash if you attempt to make a static collection using a model with TSpace flag = 240.
- To fix this, simply load the model in NifSkope after exporting it from Blender. Once in Nifskope select, "BSFadeNode->NiTriStrips->NiTriStripsData" with your mouse. If you have multiple NiTriStrips blocks in your model, you will need to repeat this for each NiTriStrips block. Once selected, find the "TSpace" flag and double-click it to change it. Set the value to 16, then save the model.
- These two changes will allow your Blender-created models to work correctly with Static Collections.


